TIG Torch for Aluminum Welding: What You Actually Need
 Oct 19, 2026|
 View:5
The right setup for aluminum is simple: a water-cooled tig torch with a flex head, an amperage rating that matches the work, pure or lanthanated tungsten, a gas lens with a #5 or #6 cup, and argon gas. Welders who run air-cooled torches on thick aluminum often watch the handle heat up and the bead turn ugly. A practical tig welding guide should fix that without emptying a wallet. This one sticks to the essentials, so readers skip the extras that never earn their cost.
Key Takeaways
Choose a water-cooled torch for most aluminum welding. It handles heat better and lets you weld longer without stopping.
Match the torch's amperage rating to the thickness of your aluminum. Always check the continuous rating, not just the peak.
Use 2% lanthanated tungsten for modern inverter welders. It starts easily and lasts longer than pure tungsten.
Set AC balance around 30% EP for clean aluminum. This gives good cleaning and penetration.
Use a gas lens with a #5 or #6 cup. It improves gas coverage and keeps the weld clean.
Set argon flow to about 10–15 CFH for a #5 cup and 12–16 CFH for a #6 cup. Adjust slightly higher for aluminum.
Hold the torch at a 15–20 degree angle and push it forward. This technique keeps the weld clean and controlled.
Keep spare collets, collet bodies, cups, and a gas lens on hand. These parts wear out and cause problems if missing.
TIG Torch Types for Aluminum
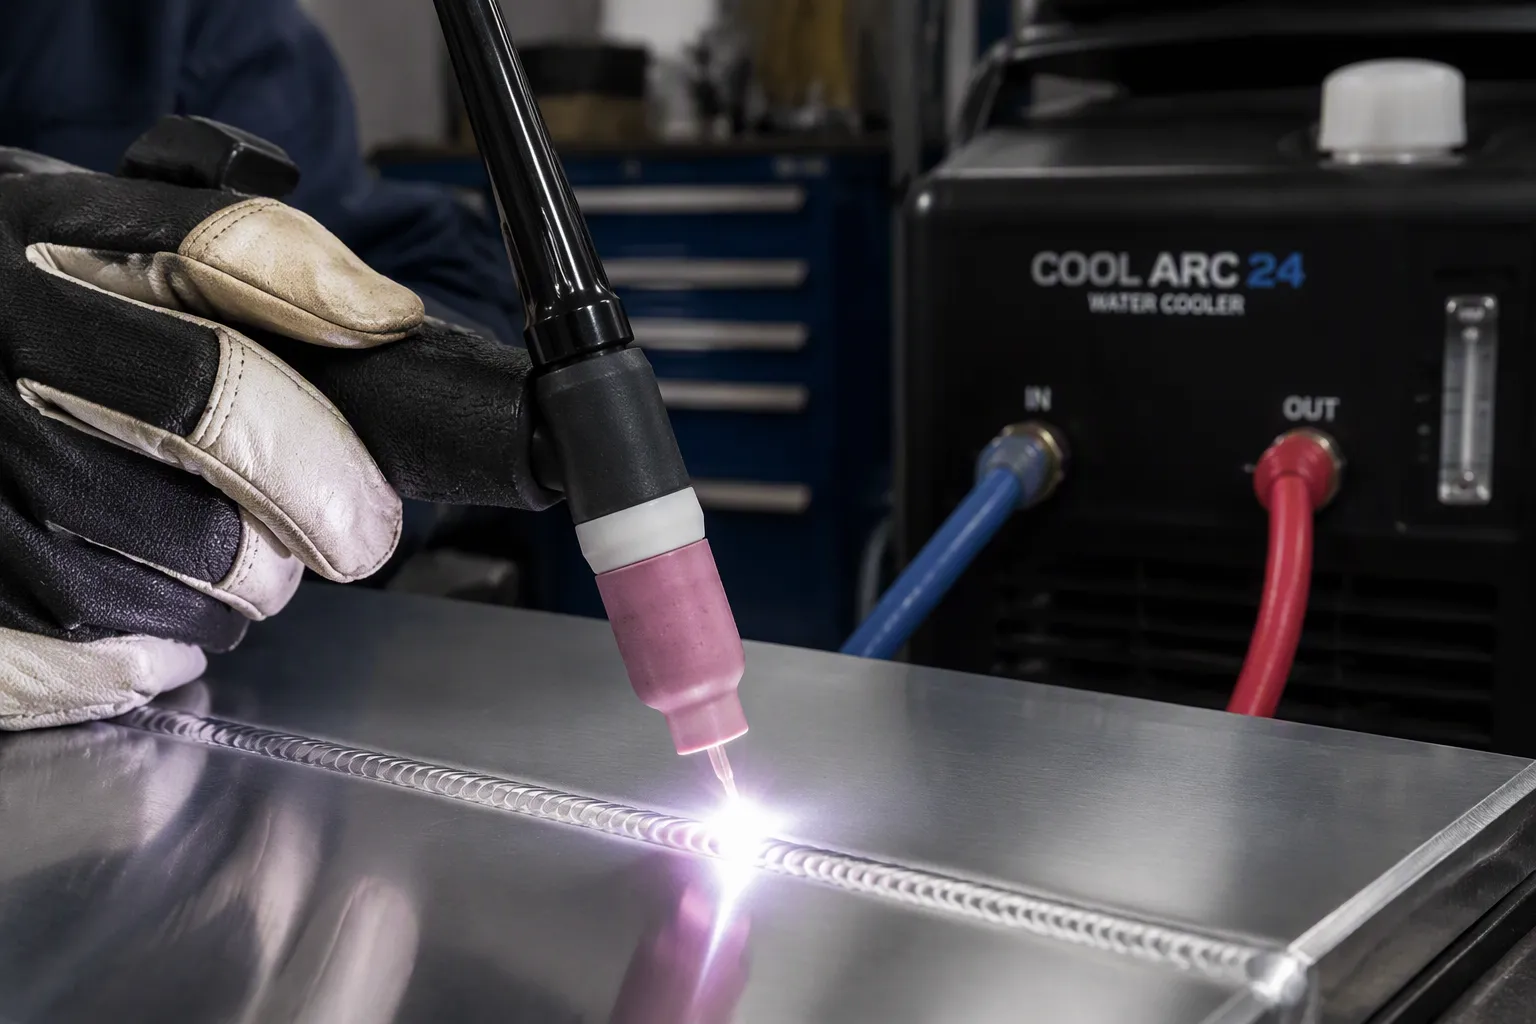
Aluminum behaves differently from steel, and that difference drives every torch decision. The metal conducts heat away from the puddle fast, and it has little heat capacity of its own. A welder pours amps into the joint, the base metal wicks that heat into the surrounding plate, and the torch body absorbs the rest. Cooling becomes a duty-cycle problem, not a comfort problem. Pick the wrong torch style and the handle overheats long before the bead is finished.
Air-Cooled Torches
Air-cooled torches suit thin aluminum and low-amperage work. They run light, they need no cooler, and they cost less up front. The trade-off shows up in size and weight. An air-cooled body carries more mass to shed heat, so the head feels bulky in tight joints, and the cable bundle gets stiff.
The duty cycle tells the real story. A typical WP-17 air-cooled torch carries a stated rating of 150 amps at 50% duty cycle. Real-world reports paint a harsher picture. At 150 amps on AC, users get roughly 4 to 5 minutes before the torch needs a break. Push to 200 amps and the window shrinks to about 1 to 2 minutes, followed by 2 to 3 minutes of cooling. At 230 amps, the torch manages about a minute or less, close to a 10% duty cycle. Many operators treat 100 amps AC as the practical ceiling, because collets scorch above that point. Anyone welding aluminum with the tig on thicker plate will fight this limit constantly.
Water-Cooled Torches
Water-cooled torches are the practical default for most aluminum work. A water jacket pulls heat out of the head continuously, so the torch holds its rating instead of fading. The head stays small, which helps in fillet joints and out-of-position work. A tig welder can run long beads without stopping to let the handle cool.
The setup demands more gear. A water-cooled torch needs a cooler unit or a tap-water supply, plus feed and return hoses. That adds cost, bench space, and one more thing to maintain. Hoses need routing that keeps them from kinking or dragging across hot plate. For a hobbyist running occasional thin sheet, the extra plumbing may not pay off. For anyone doing regular aluminum welding, it usually does.
Which One to Choose
Match the torch to the job, not to the catalog. Thin gauge, low amps, and short beads favor an air-cooled torch. The lighter package wins when access matters more than endurance. Thicker sections, long seams, and high amperage favor water cooling, because the duty cycle stays usable.
A simple test settles it. If the planned work sits near or above the realistic air-cooled limit, go water-cooled. If the work stays well below that line and the beads are short, air cooling works fine. Either way, the tig torch must carry an amperage rating that covers the job with margin. A tig (gtaw) welder who ignores that rule ends up with scorched consumables and inconsistent arcs. The next section covers how to read those ratings and size the torch by material thickness.
TIG Welding Aluminum: Amperage and Duty Cycle
Reading Torch Ratings
Torch ratings come in two flavors, and mixing them up causes real trouble. Peak amperage is the highest number the torch survives for a moment. Continuous amperage is what it holds all day without cooking the head or the cable. A welder who sizes by the peak number ends up with a torch that fades halfway through a seam.
Read the label carefully. Manufacturers often print something like 150 amps at 50% duty cycle, and that second number matters as much as the first. A torch rated 200 amps peak may only hold a lower continuous figure. For tig welding aluminum, plan around the continuous figure, then add a little margin.
Sizing by Thickness
Thickness drives amperage, and amperage drives torch choice. Thin sheet runs at low amps and suits a small torch. Thicker plate demands more current, longer beads, and a torch that can take the heat. Exact numbers vary with joint design, travel speed, and preheat, so treat any chart as a starting point and tune from there.
Tungsten selection follows the same logic. A 3/32-inch 2% lanthanated, E3, or LayZr tapered electrode is a solid learning choice for aluminum welding. It covers a wide amperage band and forgives small mistakes. A 2% lanthanated 3/32 tungsten can handle 200 amps on AC. A thinner tungsten gives a thinner arc on aluminum. That helps on fine work and tight joints. Step up the diameter when the amps climb, or the tip will ball up and wander.
Duty Cycle Basics
Duty cycle is simple math. It tells a welder how many minutes out of ten the torch can run at its rated amperage before it needs to cool. A 60% rating means six minutes of work and four minutes of rest. Push past the rating and the heat builds faster than the torch sheds it. Water cooling stretches that window considerably. A water-cooled torch pulls heat out of the head continuously, so it holds higher amperage for longer. Air-cooled units rely on the surrounding air, and they lose ground fast on thick aluminum. Anyone planning long beads should treat cooling as part of the amperage decision, not an afterthought. Duty-cycle definitions and rating conventions follow published welding standards.
Tungsten for Aluminum
Pure Tungsten
Pure tungsten (green) was the traditional choice for AC welding on aluminum. It balls up into a wide, stable arc on older transformer machines, and it costs less than blended electrodes. That low price and gentle arc make it a reasonable starting point for hobbyists running basic equipment.
The drawbacks show up fast on modern work. Pure tungsten has a short lifespan, and it performs poorly on inverter-based welders. Many operators report that it balls up too easily on inverters, which ruins arc control.
| Aspect | Pure Tungsten (WP) for AC TIG on Aluminum |
|---|---|
| Advantages | Good arc stability at low amperage; inexpensive |
| Disadvantages | Short lifespan; not ideal for inverter welders |
| Best suited for | Older transformer-based TIG welders |
Lanthanated Tungsten
Lanthanated tungsten (gold or blue) has become the go-to electrode for aluminum welding. It starts easier, holds a stable arc, and lasts longer than pure tungsten. The 2% blend also needs about 15% less amperage to start and sustain a low-current arc, a figure commonly cited in manufacturer guidance.
"If your machine is a transformer, then use pure (green). If it is an inverter, 2% Lanthanated is the best all around tungsten..." That advice captures the practical split. Lanthanated tungsten resists thermal shock from pulsing and re-ignitions, so it handles the stop-start rhythm of aluminum work. It also runs well on both AC and DC, which means one electrode covers most jobs in the shop.
Diameter and Preparation
Match the electrode diameter to the amperage. A 3/32-inch tungsten handles most learning work on aluminum, and it usually holds up to around 200 amps. Step up the size when the current climbs, or the tip will ball up and the arc will wander. A thinner tungsten gives a thinner, more focused arc on fine work.
Preparation depends on the machine. Transformer welders want a balled tip, so the electrode forms a rounded end on AC. Inverter welders work better with a ground tip, because the arc stays tight and the puddle stays controlled. Grind lengthwise along the electrode, not across it, so the arc does not scatter. Keep a dedicated grinding wheel for tungsten, and avoid contaminating the tip with other metals.
TIG Welding Aluminum Settings
AC Balance
AC balance controls the split between cleaning and penetration in every arc cycle. The electrode-positive (EP) portion scrubs away aluminum oxide from the surface. The electrode-negative (EN) portion melts the base metal and drives heat into the joint. Since EP and EN always add up to 100%, increasing one steals time from the other. More EP means stronger cleaning but shallower penetration. More EN means deeper melt but less oxide removal.
A welder needs enough cleaning to break through the oxide layer without sacrificing penetration. Too much EP causes tungsten balling or splitting. Too little leaves dirty, sooty, dull welds that look like a beginner's first attempt. The sweet spot depends on material condition.
| Condition | AC Balance (EP/EN) | Cleaning Action | Penetration |
|---|---|---|---|
| Perfectly clean material, max penetration | 15% EP / 85% EN | Low | Highest |
| Standard clean aluminum (best starting point) | 25–30% EP / 70–75% EN | Moderate | High |
| Lightly oxidized | 35% EP / 65% EN | High | Moderate |
| Oxidized / cast aluminum | 50% EP / 50% EN | Highest | Lowest |
Start at about 30% EP for most tig welding aluminum jobs. Fine-tune in 5% increments from there. Most welds never need more than 45% cleaning action. Exceeding 50% EP can ball and vaporize the tungsten entirely.
Machine conventions vary. Some welders set balance by EN percentage, running around 70–75 EN. Others set by EP, using roughly 25–30 EP. Check which polarity the machine references before making adjustments.
The more pre-cleaning done on the aluminum, the more EN a welder can run. Clean material with a fresh wire brush allows deeper penetration and a narrower etched zone. Dirty or cast material demands more EP time to handle heavy oxidation.
AC Frequency
AC frequency controls how many times per second the polarity switches between positive and negative. Higher frequency narrows and stiffens the arc, improving directional control. Lower frequency widens the arc and spreads heat across a broader area.
| Frequency Setting | Effect on Arc | Effect on Bead Appearance |
|---|---|---|
| Higher AC frequency | Narrows and stiffens the arc, improving directional control | Produces a narrower bead profile |
| Lower AC frequency | Widens the arc and increases heat input | Broader bead with more heat spread |
The effect is noticeable but not dramatic. One welder testing low-current aluminum work noted that increasing frequency helped focus the arc a little, but it was not like night and day. He left his machine at 200 Hz after trying both extremes.
"My settings were 65% EN, 200 Hz, 25 Amps... AC frequency seems to help focus the arc a little, but it's not like night and day... so I left it at 200Hz."
For most aluminum welding, a mid-range frequency around 120–200 Hz works well. Lower frequencies around 60–80 Hz suit thicker sections where heat spread matters more. Higher frequencies help with thin material and tight joints where arc control wins.
Technique Basics
Proper hand and torch placement makes the difference between clean beads and frustration. The torch angle should sit at approximately 15–20 degrees from vertical. This angle maintains good visibility of the arc and allows smooth filler metal feeding. TIG welding aluminum calls for a notably different torch angle than walking the cup on carbon steel; a steep angle that works well on carbon steel would likely cause the filler wire to ball up on aluminum.
Torch angle: approximately 15–20 degrees, held to maintain good visibility of the arc and to allow smooth filler metal feeding.
Travel direction: push the torch forward (forehand/push technique) while feeding the filler rod at about 15° into the leading edge of the weld pool.
Travel speed: maintain a consistent pace; slow travel on aluminum risks burn-through.
Always push the torch forward, never drag it. Dragging pulls contaminants into the puddle and leaves oxide streaks behind. The push technique keeps the cleaning action ahead of the molten pool.
The torch and filler rod should sit roughly at 90 degrees to each other. This geometry lets a welder feed rod smoothly without blocking view of the arc. Introduce filler metal to the puddle at the leading edge, not directly into the arc stream.
Distance from the tungsten to the workpiece matters more on aluminum than on steel. A longer tungsten-to-workpiece distance widens the arc and reduces cleaning effectiveness. Keep the arc tight for better control.
Practice tig welding puddle control on scrap before tackling real joints. Aluminum gives immediate feedback — too much heat causes sagging or burn-through, too little leaves a cold bead that fails to wet out properly.
Travel speed needs consistency above all else. Slow travel on aluminum risks burn-through, especially on thin sections. Fast travel leaves insufficient cleaning action behind. A steady rhythm produces uniform bead width and consistent penetration.
Welders who struggle with aluminum often find their hand and torch placement is off by just a few degrees. Small adjustments to torch angle or rod position frequently solve persistent problems. The distance from the tungsten to the workpiece also deserves attention — many beginners run too long an arc without realizing it. Torch and hand positioning should feel stable and repeatable. Resting a hand on the workpiece steadies the torch and reduces fatigue during long beads. A comfortable stance allows consistent travel speed across an entire joint.
How to TIG Weld Aluminum: Gas and Shielding
Cup Size and Gas Lens
A gas lens is the first upgrade worth making for aluminum welding. The lens stacks fine mesh screens inside the torch head. Those screens straighten the gas flow and hold a stable shield over a wider area. A standard collet body pushes gas out in a turbulent cone. That turbulence pulls air into the stream, and air ruins an aluminum puddle fast.
A #5 cup is the common starting point. The practical range for aluminum sits between #5 and #6 cups. Size up only when the joint needs more coverage, such as a wide fillet or a deep groove. A bigger cup on thin work just wastes gas and blocks the view.
Argon Flow Rates
Flow rate follows cup size. The rough rule says cubic feet per hour equals the cup number times two, so a #6 cup starts near 12 CFH. Aluminum on AC needs a bit more, roughly 5 to 15 percent above the base figure.
| Cup size | Base argon flow (CFH) | Aluminum AC adjustment |
|---|---|---|
| #5 (10 mm / 3/8 in) | 10–14 | +5–15% higher flow |
| #6 (11 mm / 7/16 in) | 12–16 | +5–15% higher flow |
A flow meter beats a plain gauge every time. A gauge reads pressure at the regulator. A flow meter reads actual gas delivery at the torch, so the welder sees what reaches the puddle. Keep flow under about 25 CFH on a #6 cup without a lens. Too much gas creates turbulence, and turbulence drags air into the shield.
Signs of Poor Shielding
The weld tells the story before the welder checks anything. A gray bead usually means the shield fell short. So does a black or dull surface. Both point to weak gas coverage or a dirty joint.
Watch for these symptoms during aluminum TIG welding:
Gray welds
Oxides in the puddle, often called pepper in the puddle
Contamination across the bead
Porosity or colors in the weld
Brown oxidation flakes on the surface
Any of these signs means the welder should stop and check the setup. Look at gas flow, cup condition, and torch angle. A clogged lens or a cracked cup leaks shield gas and causes the same trouble. Clean the aluminum oxide off the joint first, then confirm the argon reaches the puddle in a steady stream. Good shielding keeps the bead bright and the arc stable. Shielding-gas practice for GTAW aluminum is covered in detail by welding research institutes.
Torch Features That Matter
Flex vs. Rigid Head
A flex head bends where a rigid torch cannot. The articulating head repositions without tools, typically through a range of 35–40 degrees from centerline. That range matters in positional work, pipe fitting, and any joint where geometry dictates torch angle instead of operator preference. A tig welder working an inside corner or a pipe saddle often cannot reach a clean angle with a fixed head.
The payoff shows up in arc control. Tight joints and small parts need a focused arc and precise heat placement. A higher AC frequency, around 150 Hz, tightens the arc cone and reduces heat spread, which helps prevent melting edges or corners away. A tighter arc gives more control near edges and on small aluminum parts. A flex head that bends to 35–40 degrees opens access to joints a rigid torch cannot reach cleanly.
Check three things before buying one. First, the head must stay rigid after adjustment, or arc length will vary and beads will run inconsistent. Second, the flex configuration must accept a gas lens, which matters for alloys sensitive to contamination. Third, a super-flex silicone cable improves cable management in tight spaces.
Gas Valve Options
Torch gas valves come in two configurations, and the choice depends on the machine. A valved torch carries a built-in knob at the handle, so the operator controls gas flow right at the torch. This suits machines without a built-in gas solenoid, and it gives fast shutoff between beads.
A valved torch adds weight and one more adjustment point. A valveless torch relies on the machine's solenoid and flow meter, which keeps the handle lighter and the gas setting consistent. Match the torch to the power source, then confirm the gas line routes cleanly to the regulator.
Cable Length
Cable and hose length set practical reach. A longer cable lets a welder move around a large fabrication without dragging the machine closer. Extra length also adds weight and stiffness, and a heavy cable bundle tires the hand during long aluminum beads.
Pick the shortest length that covers the work area. A cable that reaches comfortably across the bench beats one that forces the welder to reposition the machine mid-joint. Route the cable so it does not kink or lie across hot plate, and keep the return lead matched in length for consistent current flow.
Consumables and What to Skip
Collets and Collet Bodies
Collets and collet bodies are sized to match the tungsten electrode diameter. A 1/16-inch tungsten uses a 1/16-inch collet body and a 1/16-inch collet. Common electrode diameters — .040-inch, 1/16-inch, 3/32-inch, and 1/8-inch — correspond to collet bodies sold in those same sizes. The collet and the collet body work as a pair, and together they transfer welding current to the tungsten.
Some welders try to stretch a setup by dropping a smaller collet into a larger collet body. Forum users report that a 1/16-inch collet inside a 3/32-inch body can work if the collet tightens and holds the electrode. Experienced users still say they always change both parts to match the electrode size. A mismatched collet and collet body may hold the tungsten, but it is not recommended.
Aluminum raises the stakes here. In AC mode, more heat drives into the tungsten, so a larger-diameter electrode and its matching collet and collet body handle the higher amperage. A welder who keeps a full set of matched sizes avoids mid-job swaps and poor current transfer.
Spare Parts to Keep
A small stock of spares keeps a session moving. Keep spare collets and collet bodies in each size the shop actually runs. Add a few extra cups, since a cracked or clogged cup kills gas coverage fast. A spare gas lens and a spare O-ring set cover the most common failures.
A full consumable kit for #9 or #20 small torches can make aluminum TIG welding easier and faster. These small torch bodies fit tight joints, and a kit keeps every size on hand. Stock tungsten in the diameters the work demands, plus a dedicated grinding wheel. Nothing stalls a bead faster than a missing part on a Saturday afternoon.
Features You Can Skip
Some torch features add cost without helping most aluminum work. Fancy handle grips and oversized knobs raise the price and the weight. A welder gains little from either on a standard bench job.
Skip built-in amperage displays on the torch handle. The machine already shows the setting, and the extra electronics add a failure point. Skip quick-disconnect fittings unless the shop swaps torches constantly. Each connection is one more place for a gas leak.
Stick to the basics: a matched collet set, spare cups, a gas lens, and the right tungsten. Those parts earn their keep. The rest mostly pads the invoice.
Conclusion
A water-cooled tig torch with a flex head covers most aluminum work. Match the amperage rating to the thickness, and add margin above the continuous figure. Pure or lanthanated tungsten both work, and a gas lens with a #5 or #6 cup keeps the shield steady. Set argon flow to suit the cup size, then check the bead for gray color or porosity. Electrode selection and joint preparation also follow international welding guidance for consistent results.
Spend money on cooling and consumables. Skip the fancy handles and built-in displays. That balance keeps welding costs sane and results consistent.
Readers who want a reliable TIG torch manufacturer can look at Blackwolf for quality torches and consumables.
Looking for a Reliable TIG Torch for Aluminum Work?
Blackwolf manufactures TIG torches and consumables with matched collet sets, gas lens options, and flex-head models for aluminum welding. Buyers can request specifications, size charts, and quotations for OEM or wholesale orders.
Send an InquiryView TIG Torch Products →FAQ
Sometimes, but the window is narrow. An air-cooled torch rated 150 amps at 50% duty cycle gives roughly 4 to 5 minutes of actual welding at that amperage on AC. Thin sheet and short beads work fine. Thicker plate will overheat the handle before the joint is done.
Too much electrode-positive time or too many amps for the electrode size causes this. A 3/32-inch tungsten usually holds up to around 200 amps. Step up the diameter when current climbs, and check the AC balance setting. Excess cleaning action balls and even vaporizes the tip.
Start with a #5 cup on a gas lens. The practical range for aluminum sits between #5 and #6 cups. Size up only when a wide fillet or deep groove needs more coverage. A bigger cup on thin work wastes gas and blocks the view of the puddle.
Aluminum pulls heat away fast, so it needs more current for the same thickness. Exact numbers vary with joint design and travel speed, so treat any chart as a starting point. Tune upward until the bead wets out, then back off before burn-through.
Yes, in tight joints. A flex head bends roughly 35–40 degrees from centerline, so a welder can reach an inside corner or pipe saddle without fighting the torch angle. Good puddle control depends on a stable, repeatable torch position, and a flex head delivers that in awkward spots.
Weak shielding causes it. Gray beads, porosity, and brown oxidation flakes all point to gas coverage that fell short. Check the flow rate, the cup condition, and the torch angle. A clogged lens or cracked cup leaks shield gas and produces the same symptoms.
It is. The torch sits at roughly 15–20 degrees from vertical, and the filler rod feeds at about 90 degrees to the torch. Push the torch forward, never drag it. Small adjustments to hand and torch placement often fix persistent problems with bead shape and puddle control.
Not always. Short beads on thin gauge favor a lighter air-cooled torch. Regular work on thicker sections favors water cooling, because the duty cycle stays usable. Match the torch to the job, and add margin above the continuous amperage rating.
References and Notes
AWS (American Welding Society) — published welding standards, including duty-cycle and rating conventions for GTAW equipment (aws.org)
TWI (The Welding Institute) — research institute resources on GTAW aluminum and shielding-gas practice (twi-global.com)
IIW (International Institute of Welding) — international welding guidance on electrodes and joint preparation (iiwelding.org)
Data notes: the WP-17 150 A @ 50% duty cycle figure is a typical manufacturer rating; the 4–5 min (150 A AC), 1–2 min (200 A AC), and about 1 min (230 A AC) run times are real-world operator reports; the 100 A AC practical ceiling for air-cooled torches is operator experience; the 3/32-inch lanthanated 200 A AC figure, the ~15% lower start amperage, AC balance (15–50% EP), frequency (60–200 Hz), flow (cup × 2 CFH base) and flex-head 35–40° range are industry practice or manufacturer guidance, so treat them as starting points and tune for the joint.
The closing brand reference was corrected from a third-party name to the site's own brand, Blackwolf, to keep recommendations consistent with the publisher's own products.
Images — Pexels (free-license stock photography)
Internal links — all links under blackwolfwelding.com are the site's own pages and are preserved in full